Table of Contents
- 📖 Table of Contents
- What is AI Image Editing?
- How to Restore Old, Damaged & Torn Photos with AI
- What Types of Damage Can AI Repair?
- Automatic Black & White Colorization
- Enhance Faces & Make Portraits More Photogenic
- What Face Enhancement Does
- Ideal Use Cases for Face Enhancement
- How to Fix Blurry Photos and Sharpen Image Quality
- How AI Fixes Blurry Images
- Understanding the Limitations
- AI Image Upscaling: Increase Resolution Without Losing Quality
- What AI Upscaling Achieves
- When to Use AI Upscaling
- Image Restore vs Face Enhance: Which Mode Should You Use?
- Step-by-Step Tutorial: Restore an Old Family Photo
- Step 1: Open the Image Edit Tool
- Step 2: Upload Your Damaged Photo
- Step 3: Process Your Image
- Step 4: Download Your Restored Photo
- Tips for Getting the Best AI Photo Restoration Results
- Technical Specifications
- Frequently Asked Questions
- What file types does the AI Image Editor support?
- Can AI restore heavily damaged photos?
- How do I fix a very blurry photo?
- Will AI colorization look natural?
- Is my data private and secure?
- Can I use this for video restoration?
- How many credits does each image edit cost?
📖 Table of Contents
- What is AI Image Editing?
- Restore Old & Damaged Photos
- Enhance Faces & Portraits
- Fix Blurry & Low-Quality Photos
- Upscale & Increase Resolution
- Image Restore vs Face Enhance: Which Mode to Use?
- Step-by-Step Tutorial
- Tips for Best Results
- Frequently Asked Questions
What is AI Image Editing?
Have you ever found an old family photo that’s torn, faded, or scratched beyond recognition? Or taken a photo that came out blurry and wished you could fix it? AI image editing makes the impossible possible.
Using deep learning models trained on millions of images, AI can:
- Restore old photos – repair tears, scratches, and water damage
- Fix blurry pictures – sharpen out-of-focus or motion-blurred images
- Colorize black & white photos – add natural, realistic color to vintage images
- Enhance faces – improve skin texture, lighting, and facial details
- Upscale resolution – increase image size for printing or 4K displays
The AI Image Editor combines all these capabilities in one simple tool. No Photoshop skills required—just upload, select a mode, and download your enhanced photo.
How to Restore Old, Damaged & Torn Photos with AI
Traditional photo restoration required hours of manual work by skilled artists painstakingly reconstructing each damaged area. AI changes everything. Modern neural networks can analyze a damaged image, identify what’s missing, and reconstruct it photorealistically—in seconds.
What Types of Damage Can AI Repair?
- Torn photos – AI predicts and fills in ripped sections using contextual understanding
- Scratched photos – Removes scratch marks while preserving underlying details
- Faded or discolored photos – Restores original brightness, contrast, and color balance
- Water-damaged photos – Reconstructs areas affected by moisture, stains, or mold
- Creased or folded photos – Digitally smooths out crease lines and fold marks
Automatic Black & White Colorization
If you upload a black and white photo, the AI can automatically colorize it with realistic, natural-looking colors. The AI understands context—it knows that skin should look like skin, grass should be green, and the sky should be blue. It applies historically appropriate colors based on the era and content of your photo.
To restore an old photo, use the Image Restore mode in the AI Photo Restorer. This mode is specifically designed for damaged vintage photos that need repair and color reconstruction.
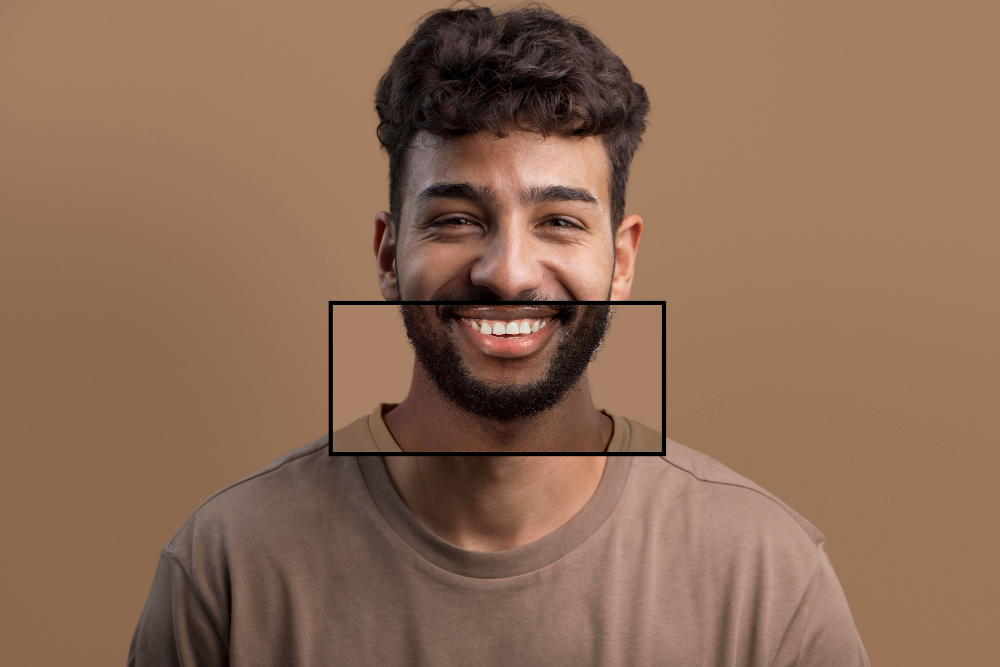
Enhance Faces & Make Portraits More Photogenic
Not all photos are damaged—some just need a little polish. The Face Enhance mode is designed for modern photos where the subject could look better. This is perfect for making your portraits look more professional and photogenic.
What Face Enhancement Does
- Improves skin texture – Removes digital noise and compression artifacts while keeping natural skin pores
- Balances lighting – Fixes harsh shadows and blown-out highlights on the face
- Sharpens details – Enhances eye clarity, hair definition, lip texture, and eyebrow detail
- Adds photogenic polish – Gives that “professional headshot” quality you see in magazines
Ideal Use Cases for Face Enhancement
- Profile pictures – LinkedIn, dating apps, social media avatars
- Selfies taken in low light – Indoor shots, evening photos
- Portraits you want to print – Frame-worthy family photos
- Group photos – Where faces are smaller and could use sharpening
Use Face Enhance when your photo isn’t damaged but you want it to look its absolute best.
How to Fix Blurry Photos and Sharpen Image Quality
We’ve all been there—you take a photo only to realize it’s blurry. Motion blur, camera shake, or missed focus can ruin what should have been a perfect moment. AI deblurring technology can help recover these photos.
How AI Fixes Blurry Images
The AI analyzes the blur pattern in your image and uses machine learning to predict what the sharp, in-focus version should look like. It can significantly improve:
- Motion blur – Caused by moving subjects or shaky hands
- Out-of-focus blur – When autofocus missed the subject
- Low-light noise – Grainy photos from high ISO settings
- Compression artifacts – JPEG blocky distortions from over-compression
Understanding the Limitations
AI enhancement isn’t magic—it can’t create detail that was never captured. Extremely blurry photos where the subject is completely unrecognizable may not fully recover. The better your starting image, the better your final results will be.
To fix blurry photos, try both Image Restore and Face Enhance modes—each uses different algorithms and may produce different results depending on the type of blur.
AI Image Upscaling: Increase Resolution Without Losing Quality
Low-resolution images look pixelated and blocky when enlarged. Traditional upscaling simply stretches existing pixels, creating a blurry mess. AI upscaling is fundamentally different—it intelligently generates new pixels based on what “should” logically be there.
What AI Upscaling Achieves
- Increases image dimensions – For example, from 500×500 to 2000×2000 pixels
- Maintains sharpness – No blurry stretching artifacts
- Can enhance detail – Sometimes adds detail beyond what was in the original
- Print-ready output – Results suitable for posters, canvases, and 4K displays
When to Use AI Upscaling
- Printing large formats – Posters, canvases, photo books, wall art
- Modern displays – Old photos look tiny on 4K monitors and TVs
- Professional work – Marketing materials, publications, presentations
Both Image Restore and Face Enhance modes include automatic upscaling as part of the enhancement process.
Image Restore vs Face Enhance: Which Mode Should You Use?
The AI Image Editor offers two specialized modes. Here’s how to choose the right one for your photo:
| Criteria | Image Restore | Face Enhance |
|---|---|---|
| Best for | Old, damaged, vintage photos | Modern photos needing polish |
| Repairs damage | ✅ Tears, scratches, fading | ❌ No damage repair |
| Colorizes B&W | ✅ Yes | ❌ No |
| Face sharpening | Moderate | High |
| Skin smoothing | Moderate | High |
| Upscaling | ✅ Included | ✅ Included |
| Ideal input | Scanned old photos, faded prints | Selfies, portraits, headshots |
Quick Rule of Thumb: If the photo is damaged, old, or black & white → use Image Restore. If the photo is fine but could look better → use Face Enhance.
Step-by-Step Tutorial: Restore an Old Family Photo
Let’s walk through the process of restoring a damaged old family photo using the AI Image Editor.
Step 1: Open the Image Edit Tool
Navigate to Image Edit from your dashboard. You’ll see a clean interface with an upload area and mode selector.

The clean interface is ready for your image—just drag and drop or click Upload.
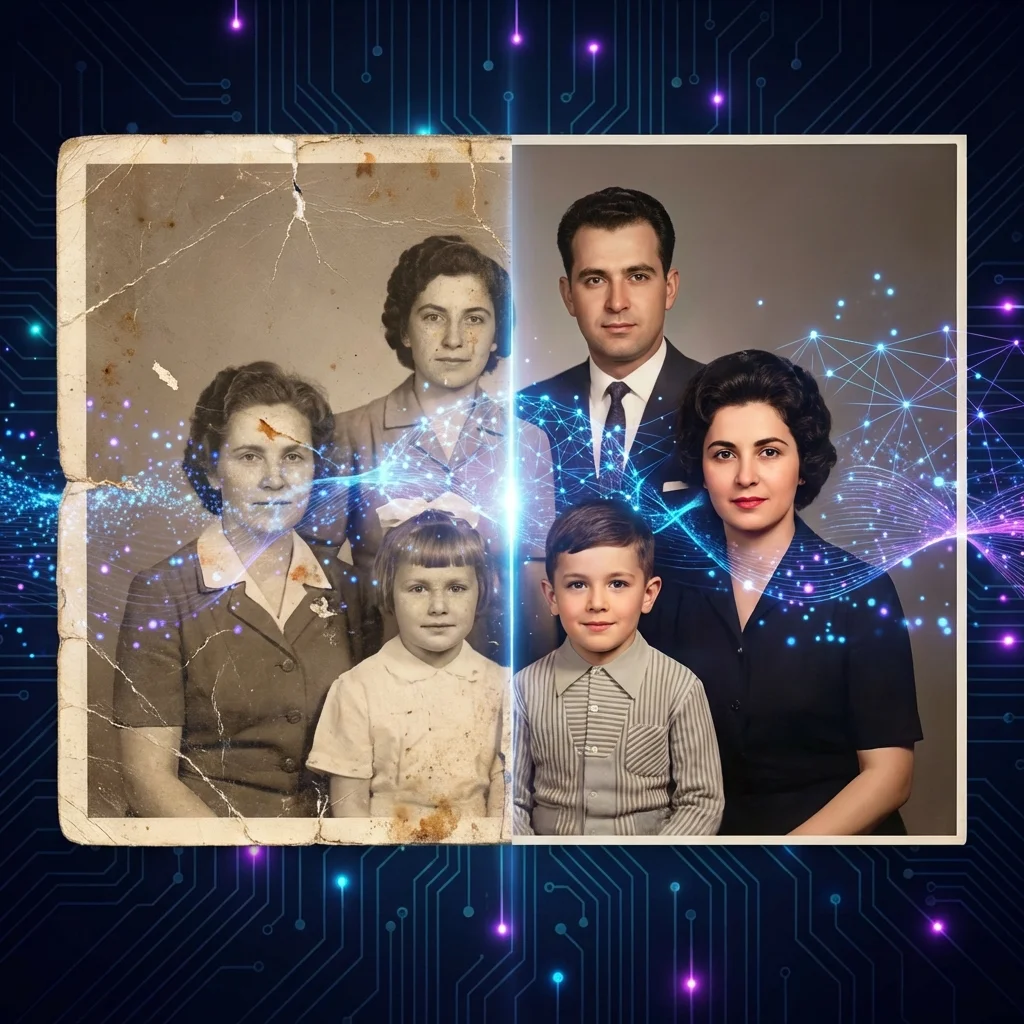
Step 2: Upload Your Damaged Photo
Click Upload or drag-and-drop your damaged photo. In this example, we’re using a faded, torn family portrait from the 1950s. Once uploaded, select Image Restore from the Edit Mode dropdown.
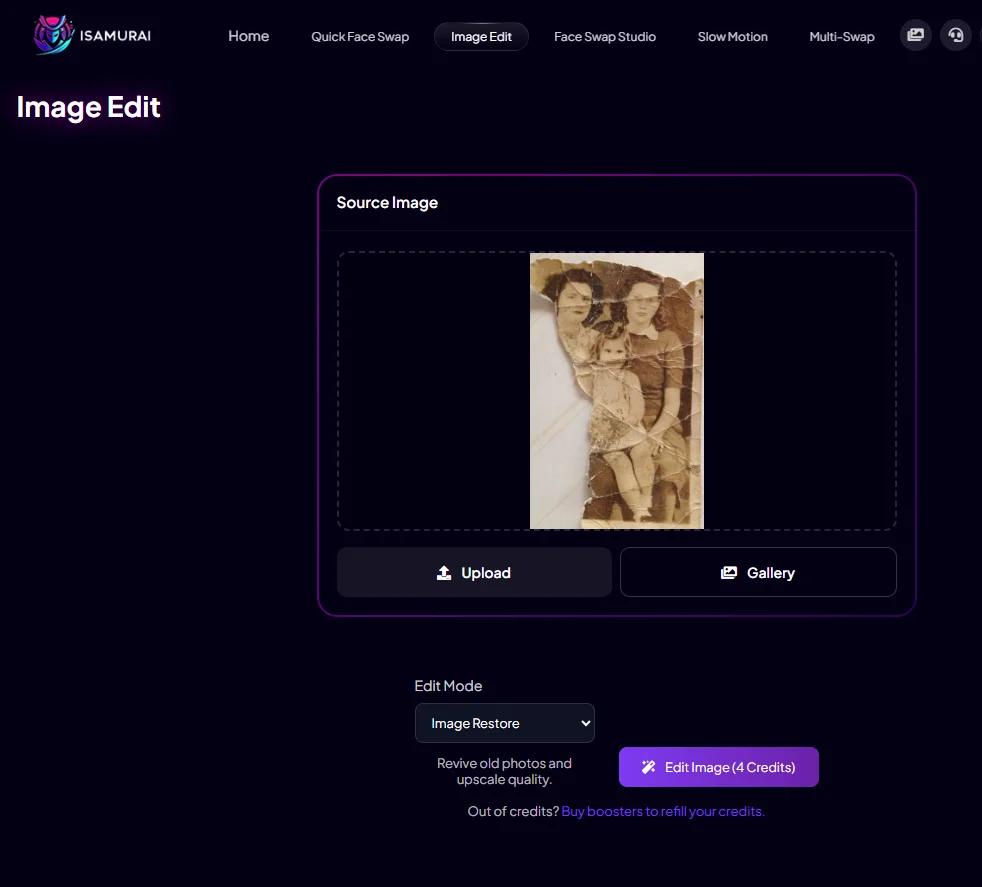
This faded, torn family photo from the 1950s will be our restoration test case.
Step 3: Process Your Image
Click Edit Image (costs 4 credits). The AI will analyze your image and process it—this typically takes 5-15 seconds depending on the complexity of the damage.
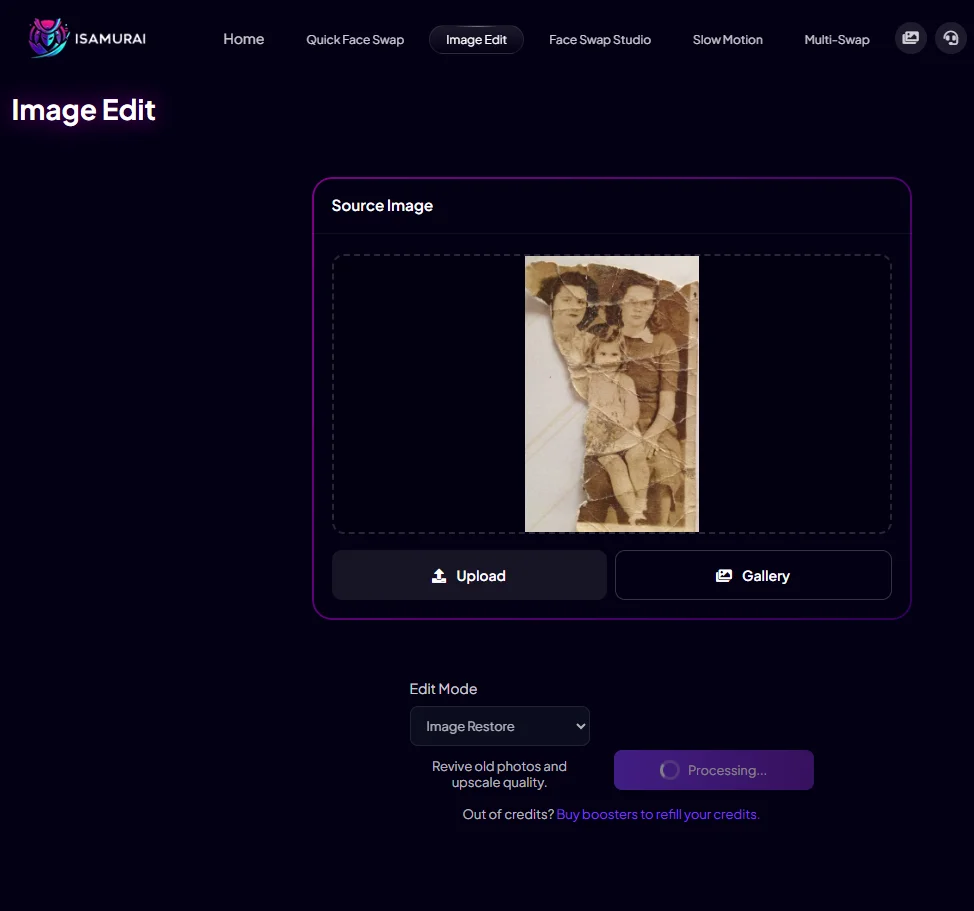
Processing in progress—the AI is analyzing damage patterns and reconstructing the image.
Step 4: Download Your Restored Photo
When processing is complete, a preview modal appears with your restored image. Notice how the AI has:
- ✅ Repaired torn edges completely
- ✅ Colorized the black & white image with natural tones
- ✅ Enhanced facial details for clarity
- ✅ Improved overall image quality and contrast
Click Download to save your restored photo to your device.
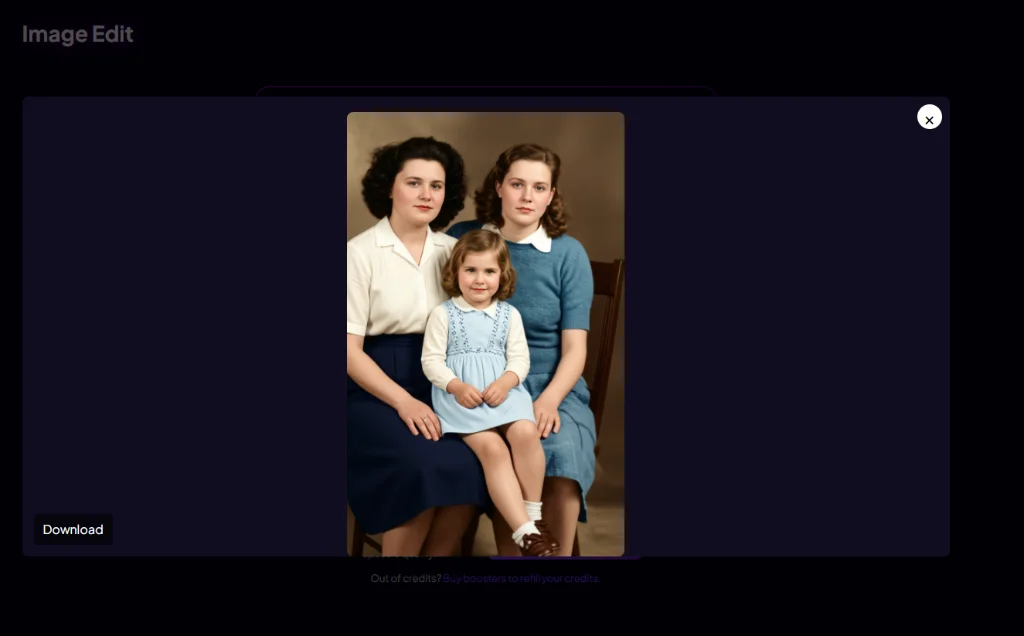
The final result: a beautifully restored, colorized family portrait ready for framing.
Tips for Getting the Best AI Photo Restoration Results
- Higher input quality = better output – Scan old photos at 300+ DPI rather than taking a phone photo of a photo
- Clean the original first – Dust and debris on the photo can confuse the AI
- Crop before uploading – Focus on the specific area you want restored
- Try both modes – Sometimes Face Enhance works better than Image Restore for certain images (and vice versa)
- Manage expectations – AI can’t create detail that was never captured; extremely destroyed photos have limits
Technical Specifications
- Supported formats: JPG, PNG, WEBP
- Maximum file size: 10MB
- Credit cost: 4 credits per image
- Processing time: Typically 5-15 seconds
Frequently Asked Questions
What file types does the AI Image Editor support?
The AI Image Editor accepts JPG, PNG, and WEBP images up to 10MB in size.
Can AI restore heavily damaged photos?
Yes, the AI can handle significant damage including tears, water stains, scratches, and severe fading. However, if more than 50-60% of a face or critical area is completely missing, results may vary. The AI does its best to reconstruct based on available context.
How do I fix a very blurry photo?
Upload the blurry image and try both Image Restore and Face Enhance modes. Each uses different algorithms optimized for different types of enhancement. For extreme blur, results may be limited—AI can only enhance detail that’s at least partially present.
Will AI colorization look natural?
The AI is trained on millions of color photographs and produces realistic results for most images. It understands context—skin tones, sky, grass, clothing fabrics—and applies historically appropriate colors. Occasional minor manual adjustments may be desired for specific preferences.
Is my data private and secure?
Yes. All uploaded images are processed in your private session and are not used for AI training or shared with third parties. Images are automatically deleted after processing. See our Privacy Policy for complete details.
Can I use this for video restoration?
Currently the AI Image Editor works with single images only. For video enhancement, you can extract frames, restore them individually, then recombine—or use our Face Swap Studio which includes face enhancement options for video, or Slow Motion for frame interpolation.
How many credits does each image edit cost?
Each image edit costs 4 credits, regardless of which mode you use (Image Restore or Face Enhance). View our pricing plans to find the right option for your needs.
Related Tutorials & Features
- Restore your photos instantly: Try our AI Image Restorer
- Learn to recover damaged photos: How to Fix Old Photos