This is a complete walkthrough of the iSamurai AI face swap interface. The tool is organized as a 3-slide stepper (Source → Target → Export) and supports two modes: a single-face swap and a multi-face swap with per-face mapping. The tutorial below covers both, the pricing, and the most common questions.
Image face swaps are free. Video face swaps cost credits — see the pricing section for the exact rate.
Overview of the new interface
The iSamurai face swap page is a single screen with three horizontal slides:
- Slide 1 — Source. Where you pick the face you want to use. In multi mode, this slide becomes a face-mapping grid with one row per detected face.
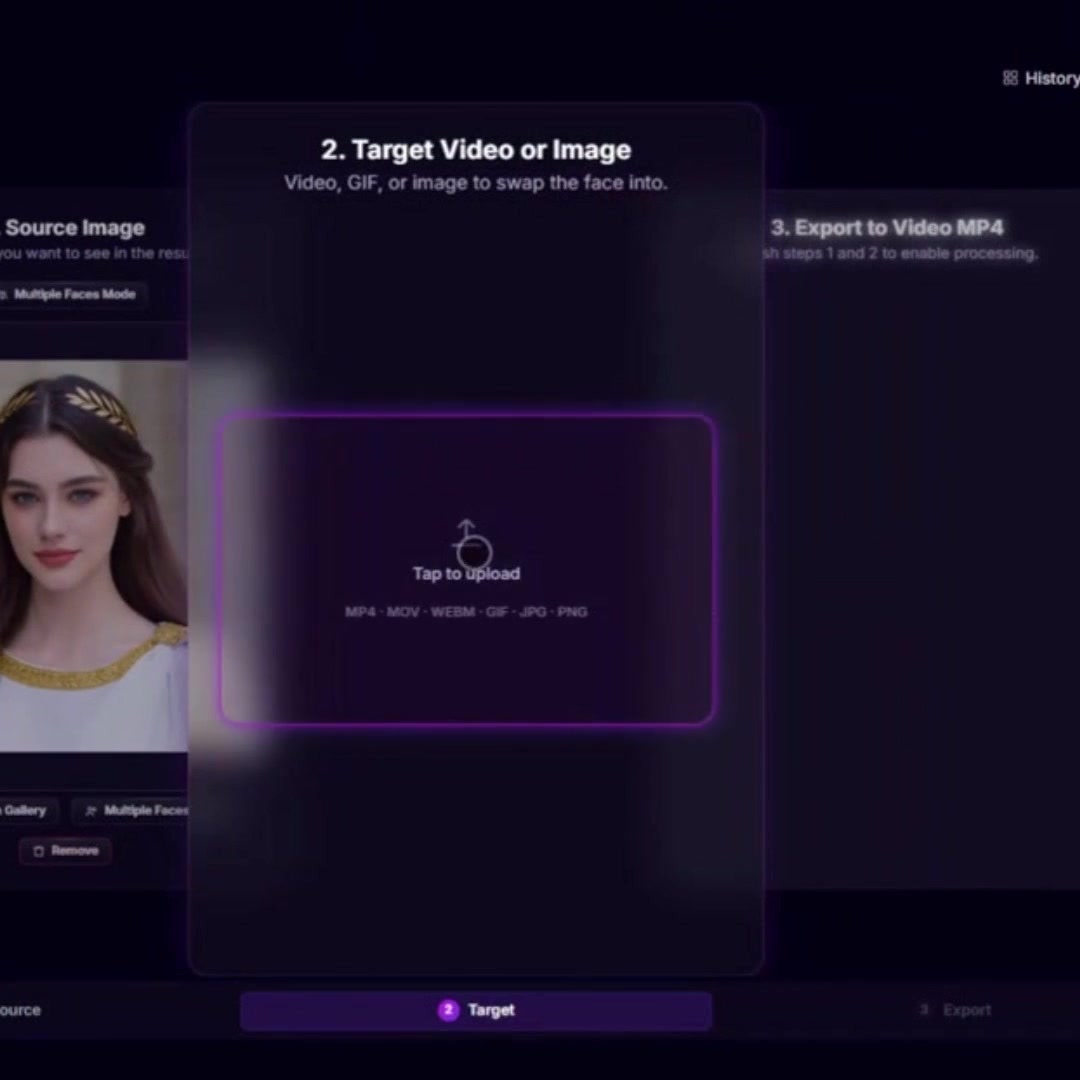
- Slide 2 — Target. Where you upload the image, GIF, or video that will receive the swap. Frame-level preview lives here.
- Slide 3 — Export. Where you choose output resolution and start the render. Progress shows on the same slide; the result appears in your History when finished.
The top of the page has two buttons: History (your past generations) and Clear (reset the current session). The mode toggle (single vs. multi) lives inside Slide 1, not in the top bar — see the switching section below.
You navigate between slides by swiping (mobile) or by clicking the side slides (desktop).
Tutorial video — single face swap
The video below shows an end-to-end single-face swap from upload to export.
The text walkthrough below covers the same flow plus the multi-face variation.
Step-by-step — single face swap
Single mode replaces one face in the target with one source face. Use it whenever the target contains a single subject, or when you only want to swap one person in a multi-person scene.
Step 1 — Pick the source face
On Slide 1, tap the upload area to pick the source face image from your device. On mobile, this opens the OS gallery directly. If you’ve used the tool before, tap From gallery to reuse a face you previously uploaded.
Step 2 — Upload the target
Swipe to Slide 2 and tap the upload area. The target can be an image, a GIF, or a video. iSamurai accepts most common formats including mp4, mov (HEVC included), webm, jpg, png, webp, and animated GIFs.
Step 3 — Run a free preview
Still on Slide 2, scrub the video to a frame that’s representative of the swap (clear face, no motion blur) and run a preview swap on that single frame. The preview is free and shows the exact quality you’ll get from the full render. Use it to confirm the source face is the right choice before spending credits.
Step 4 — Export
Swipe to Slide 3, choose your output resolution, and start. The render runs in the cloud — you can close the tab; the result lands in your History when ready. For images this completes in seconds; for videos, render time depends on length, resolution, and how many faces are present.
Step-by-step — multi face swap
Multi mode replaces several faces in the same target with different source faces. Use it for group scenes, conversations, or any clip with more than one person.
- Switch to multi mode on Slide 1 (see the switching section below for the exact button).
- Upload the target first. Multi mode needs the target before it can tell you which faces are in the scene. Swipe to Slide 2, upload the target, and seek to a frame where every face you want to swap is clearly visible.
- Run face detection. Tap the detect button. The tool returns one entry per detected person, with a thumbnail of each face.
- Map sources to faces. Swipe back to Slide 1. You’ll see a face-mapping grid: each detected face on the left, an empty source slot on the right. Tap any row, and the file picker opens — pick the source image you want to use for that specific face. Repeat for each face you want to swap. Faces left unassigned are kept as they are in the original.
- Export. Swipe to Slide 3, pick a resolution, and start. The render produces a single output where every assigned face has been swapped according to your mapping.
Useful controls on the mapping grid:
- Detect more — re-runs detection. Use it if the first pass missed a face; pick a clearer frame on Slide 2 first.
- × on a row — clears the assigned source for that face (the face goes back to “unassigned”).
- Trash icon on a row — removes the row entirely.
How to switch between single and multi mode
The mode toggle is on Slide 1 only. It is not in the top bar.
- In single mode, you’ll see a Multiple Faces Mode button above the upload area, and a second one beside the source thumbnail once you’ve picked a face. Tap either to switch to multi.
- In multi mode, the Single Face Mode button sits at the bottom of the face-mapping grid. Tap it to switch back to single.
Switching modes does not delete your target — only the source assignments are reset. Your uploaded target stays on Slide 2.
Pricing — image swaps vs. video swaps
- Image face swap: free. Unlimited image swaps after signup, no credits required.
- Video face swap: paid. 10 credits per 10 seconds of output, with a 25-credit minimum per render.
| Video length | Credits |
|---|---|
| 5 seconds | 25 (minimum) |
| 10 seconds | 25 (minimum) |
| 30 seconds | 30 |
| 60 seconds | 60 |
| 5 minutes | 300 |
Multi-face swaps cost the same as single — the price depends on duration, not on how many faces you map.
Supported formats and resolutions
Source face (the face you want to use): image only — jpg, png, webp.
Target (the media to be swapped): images (jpg, png, webp), animated GIFs, and videos in mp4, mov, webm, and most browser-decodable formats. iPhone HEVC .mov files are accepted; if your browser can’t decode HEVC locally, the in-page preview may stay black, but the server still processes the original file and the export works.
Output resolutions: 480p, 720p, 1080p, 1440p. The set you can choose from depends on your plan tier — free / lower tiers are limited to 480p, paid plans unlock 720p and 1080p, and the highest tier unlocks 1440p.
FAQ
Is the iSamurai AI face swap tool free?
Yes for images — unlimited image face swaps cost zero credits. Video face swap is paid: 10 credits per 10 seconds, with a 25-credit minimum per render.
How do I swap a face in a video online?
Log in at iSamurai, open the face swap page, upload your source face on Slide 1, upload the target video on Slide 2, run a free preview on a chosen frame, then go to Slide 3, pick a resolution and start the render. The full video face swap runs in the cloud and the result appears in History when finished.
How much does a video face swap cost?
Video face swap pricing is 10 credits per 10 seconds of video, 25 credits minimum. A 5-second clip costs 25 credits, a 30-second clip costs 30 credits, a 60-second clip costs 60 credits.
How do I swap multiple faces in one video?
Use multi face swap mode. Switch to Multiple Faces Mode on Slide 1, upload your target video on Slide 2, seek to a frame where every face is visible, run face detection, then go back to Slide 1 and tap each detected face row to assign a different source image. Faces you don’t assign stay as the original.
Can I face swap an iPhone video (HEVC / .mov)?
Yes. iSamurai accepts HEVC and .mov files exported from iPhone. If your browser can’t decode HEVC, the in-page preview may stay black, but the server processes the original file and the export still works.
Can I preview a face swap before paying credits?
Yes. On Slide 2, scrub to any frame and run a preview swap on that frame. The preview is free and shows the exact swap quality you’ll get from the full render — use it to validate the source face before spending credits on a video.
What file formats does the AI face swap tool support?
Source faces must be images (jpg, png, webp). Targets accept images, animated GIFs, and videos (mp4, mov, webm, and most common video formats).
What video resolutions are supported?
480p, 720p, 1080p, and 1440p. Available resolutions depend on your plan — lower tiers are limited to 480p, paid plans unlock the higher resolutions.
Does the AI face swap work on mobile?
Yes. The interface is mobile-first. On iOS and Android the file picker opens the OS gallery directly, so you can pick faces from your camera roll and target videos from your phone in one tap.
How long does an AI video face swap take to render?
Render time depends on video length, output resolution, and how many faces are being swapped. Short clips at 480p typically finish in a few minutes. You can close the page during rendering — the result lands in History when it’s done.
Why didn’t the tool detect a face?
Detection runs on the single frame you choose on Slide 2. If a face is missed, seek to a clearer frame (front-facing, well-lit, face large enough in the frame, no motion blur) and tap Detect more. Side angles, heavy motion blur, and very small faces are the usual reasons detection skips a face.
Do I need an account to use the AI face swap?
Yes, a free iSamurai account is required. Image swaps stay free after signup; only video renders consume credits.
Where can I find my past face swaps?
Every generation is saved to your History, accessible from the top-right of the face swap page. You can re-download or delete past results from there.
Get started
Open the iSamurai AI face swap tool to try it free on images. Log in or sign up to save your generations to History.