- What AI character swap actually does
- How to replace a person in a video, step by step
- Match the pose: the biggest quality lever you control
- Frame preview: test one frame before you render
- Quality tips for a convincing replacement
- What people use character swap for
- Video length, plans and credits
- FAQ
What AI character swap actually does
Until recently, if you wanted to replace a person in a video you needed a green screen, a costume and an editor with weeks of patience. AI character swap changes that: you upload a clip, pick the person, give the tool one photo of the character you want instead — and the new character performs the entire scene, copying the original person’s movement frame by frame.
This is different from a face swap, which changes only the face and leaves the body, clothes and hair untouched. Character swap is full video character replacement: the whole person is rebuilt — body, outfit, hair, proportions — while everything else in the shot stays exactly as filmed. The camera move, the background, the lighting and, most importantly, the motion are preserved. That last part is what makes it feel like magic: the technique is a form of motion transfer, so a walk stays the same walk and a dance stays the same dance, just performed by someone (or something) else.
If you’re deciding between the three video tools, the short version is: face swap changes the face, head swap changes the whole head including hair and head shape, and character swap changes the entire person. There’s also a mirror image of this feature — animating a still character with a video’s motion — which uses the same idea in the opposite direction.
How to replace a person in a video, step by step
The whole flow takes a few minutes in the browser. Here’s the exact sequence in iSamurai’s Character Swap:
- Upload your video. Pick a clip where the person you want to replace is clearly visible. Short clips render faster and are easier to judge, so start with a few seconds even if your plan allows more.
- Pick the person. The tool detects the people in the clip and shows them on a frame. Click the one you want replaced — in a multi-person shot, only your selection is swapped and everyone else is left alone.
- Upload your character photo. One clear picture of the replacement character — a real person, a costume, an illustration or a game-style character all work. The more of the body that’s visible in the photo, the more faithfully the outfit and proportions carry over.
- Optionally match the pose. If your photo’s pose is very different from the person in the video, open pose matching and line your photo up on the exact video frame (more on this below).
- Run a frame preview. For 2 credits you render a single finished frame — a cheap way to check identity, outfit and lighting before committing to the whole clip.
- Generate. Happy with the preview? Generate the full video. The result keeps the preview’s look because you can reuse the same seed, and the finished clip lands in your gallery ready to download.
That’s the entire process — no masks to paint, no rotoscoping, no timeline editing. If you’ve used our video face swap workflow before, this will feel familiar: the difference is simply how much of the person gets replaced.
Match the pose: the biggest quality lever you control
If you take one thing away from this guide, make it this: output quality depends heavily on how closely your reference photo’s pose matches the video — ideally its very first frame. The swap establishes your character on that first frame, and every frame after it is motion carried forward from there. When the photo already shows the character in the same position as the person on screen, the tool starts from certainty — it knows exactly how the outfit hangs, where the limbs sit and which way the head points. When the photo shows a completely different pose, the tool has to guess what your character looks like from an angle it has never seen, and guesses are where identity drifts, costumes smear and subtle motions quietly disappear.
Here’s a real example straight from the tool. The source clip is deceptively hard: a man walking away from the camera while glancing back over his shoulder, so the body is seen from behind and the face is only half-visible. We swapped him with the same ninja character twice, changing nothing but the reference photo — once with a reference deliberately matched to the video’s first frame (back to the camera, looking back), and once with a deliberately mismatched reference of the ninja facing the camera head-on.
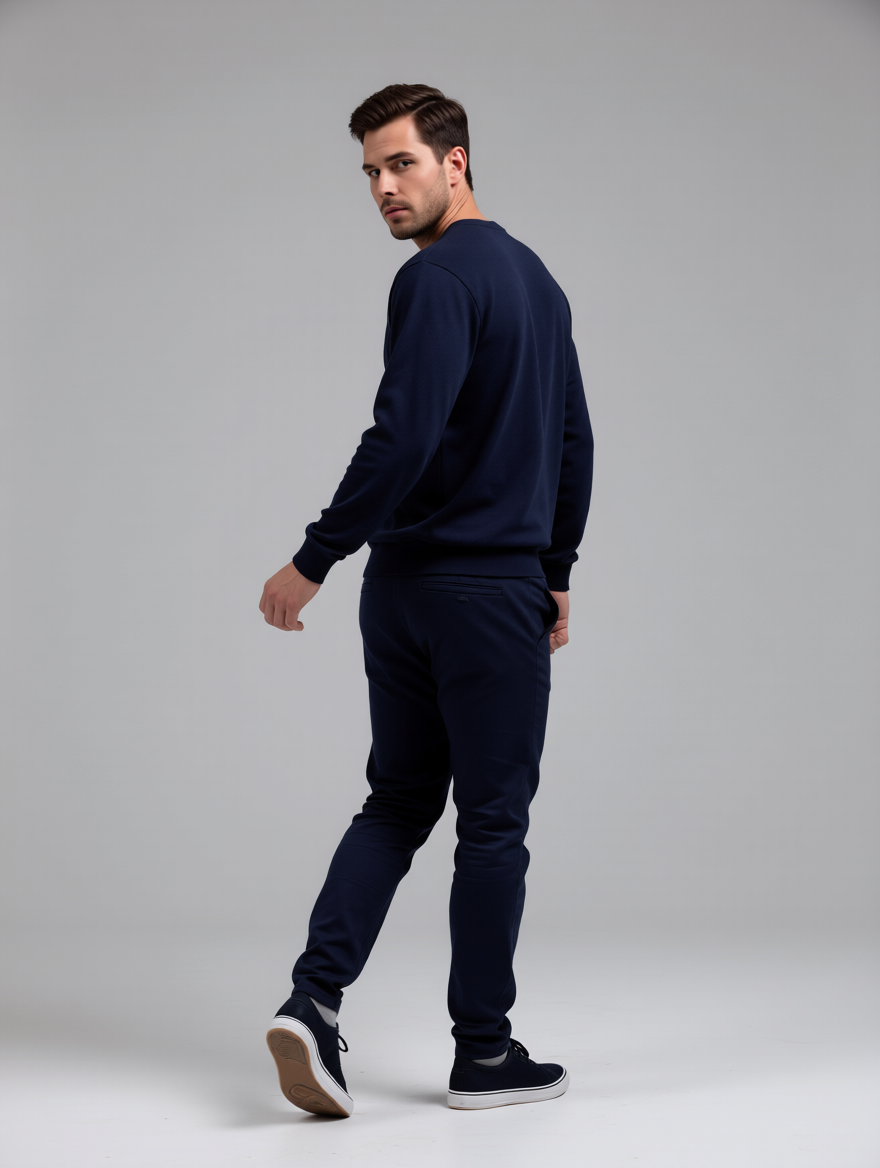
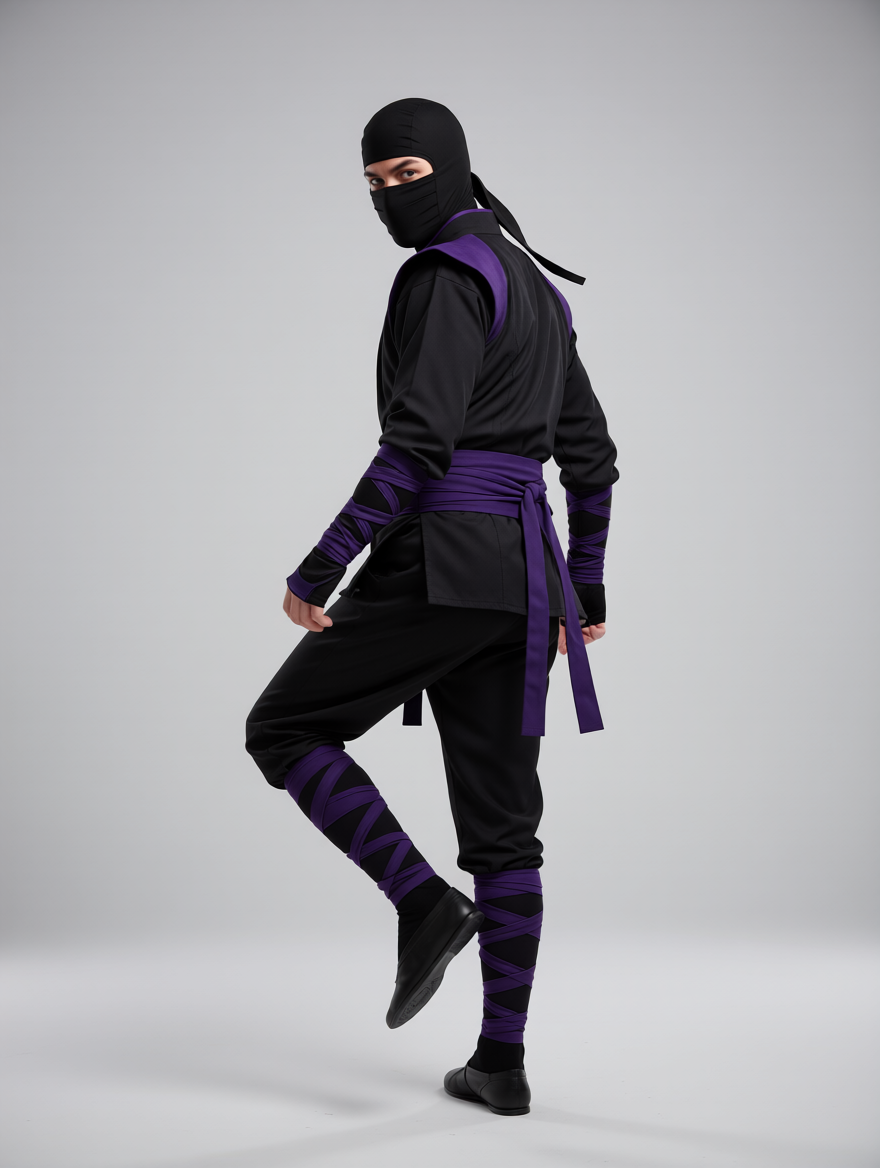
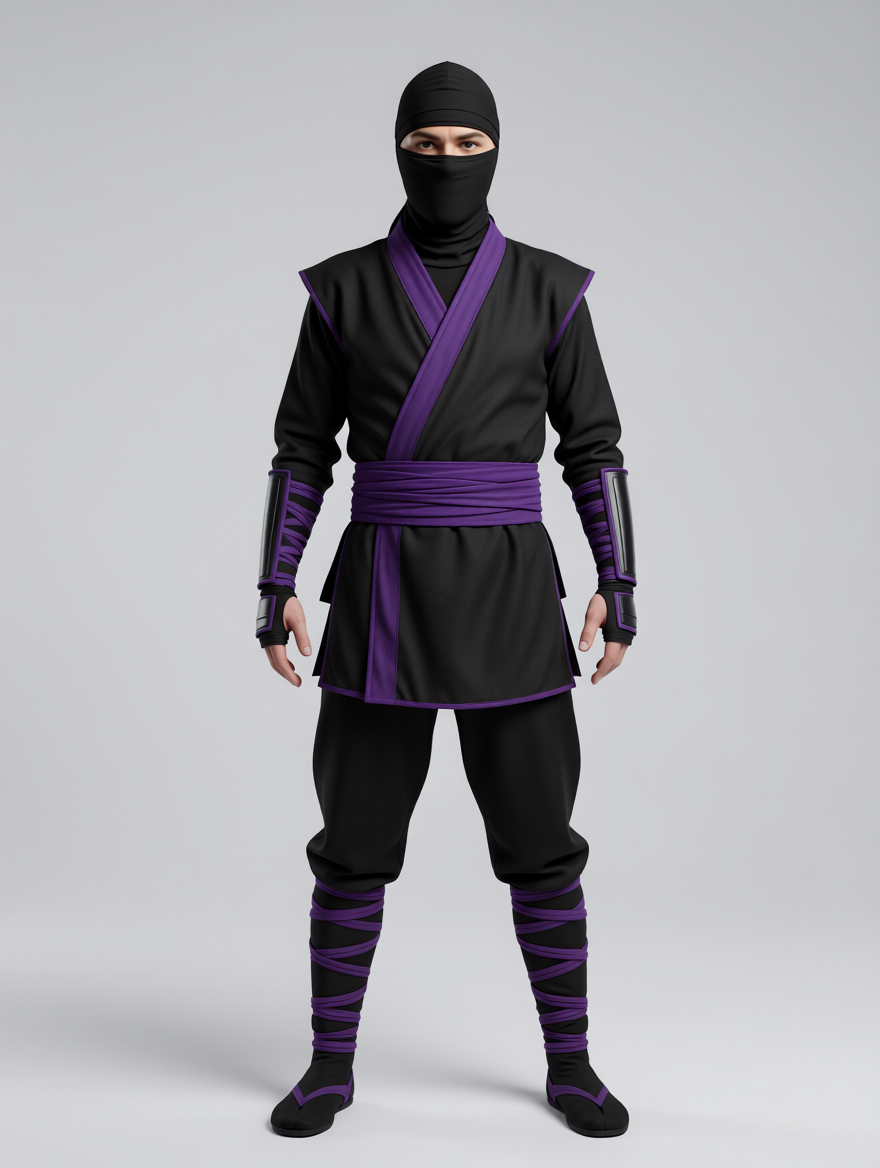
Same clip, same character, same settings — the reference pose is the only variable. Here’s what that one variable does to the result:
To be fair to the tool, the mismatched result isn’t a disaster — the AI genuinely adapts, and even a front-facing photo produces a recognisable ninja walking the same path. That adaptability also means you don’t have to obsess over frame zero: matching a pose from the middle of the video still helps enormously, because the tool carries the character backwards and forwards from whatever it can anchor to. But first-frame matching consistently gives the best quality, since nothing has to be invented at the exact point the whole video is built from. Think of it as a gradient: mismatched pose works, mid-video match works better, first-frame match works best.
What if you simply don’t have a photo in the right pose? You have two built-in ways out. The Image Edit tool can re-pose the photo you already have — ask it to turn the character around, change the head direction or adjust the stance, and you’ve manufactured a matching reference in under a minute. Or use the Match position tool inside Character Swap itself: scrub through the video’s timeline, stop on a frame, and position your character photo directly over the person — moving, scaling and rotating it until the head and body angle line up. Either route costs you about thirty seconds and pays for itself on the very first render.
One habit that pairs perfectly with pose matching: test small, then lock the seed. Run your matched setup on a 1-second clip first — a frame preview tells you how the character looks, but only a short moving test tells you how the motion survives. When a test comes out exactly right, save its seed and reuse it for the long render: the same seed reproduces the same look, so your full-length video comes out matching the test you already approved instead of a fresh roll of the dice.
Frame preview: test one frame before you render
Rendering video costs more credits than rendering an image, so blind full-length renders are an expensive way to experiment. The frame preview solves this: for 2 credits you get one fully finished frame from your clip, rendered exactly as the final video would render it.
Use it to answer the questions that matter before you spend: Does the character look like the photo? Did the outfit survive? Does the lighting sit naturally in the scene? If the answer is no, adjust the photo or the pose match and preview again — at 2 credits per try, you can afford to iterate. When a preview nails it, reuse its seed for the full render: the seed is what makes results reproducible, so the finished video comes out with the same look as the frame you approved rather than a fresh roll of the dice.
Quality tips for a convincing replacement
- Use a clean, well-lit character photo. Sharp focus, even lighting, no heavy filters. The tool can only carry over what it can see.
- Show the body, not just the face. A head-and-shoulders crop forces the tool to invent the outfit. A photo showing most of the body keeps clothing and proportions faithful.
- Prefer clips where the person stays visible. Full-body or three-quarter shots with the person on screen throughout swap more cleanly than clips with heavy occlusion or people walking out of frame.
- Steady footage helps. Motion is copied faithfully — including camera shake. A stable shot gives the cleanest result.
- Preview, then lock the seed. Never run a long render from a preview you haven’t seen. Approve a frame, keep its seed, then generate.
- Iterate on the photo, not the settings. If a result disappoints, a better reference photo fixes more problems than anything else.
What people use character swap for
Content creators put a consistent virtual persona into any stock or self-filmed clip — one character photo becomes an actor available for every video, which is the backbone of faceless channels. Marketers reshoot nothing: one filmed performance becomes ten localised variants with different presenters. Cosplayers and fandoms put a favourite character into iconic movie scenes or dance trends. Small studios previsualise casting — drop a character into the actual footage before committing to a shoot. And plenty of people simply put themselves into scenes they’d never otherwise be in; it’s the same instinct that made face swapping so popular, scaled up to the whole body.
Video length, plans and credits
How long a clip you can process depends on your plan: a free account can run a 1-second test swap — enough to see the quality with your own footage before paying anything. Kohai takes you to 10 seconds per video, Ninja to 15, Ronin to 30, and Samurai to 60 seconds. Frame previews cost 2 credits on every plan. Two capabilities are Samurai-only: multi-reference photos (several pictures of the same character from different angles, which noticeably tightens identity) and the high-quality rendering mode. Full details are on the pricing page.
FAQ
What’s the difference between character swap and face swap?
A face swap replaces only the face and keeps the original body, hair and clothes. Character swap replaces the entire person — body, outfit, hair and proportions — while keeping the scene, camera and motion exactly as filmed. If you only need a different face, a face swap is faster and cheaper; if the whole person should change, use character swap.
Does the new character copy the original person’s movements?
Yes — that’s the point. The original performance drives the new character through motion transfer, so every step, gesture and turn is reproduced. Only the person changes; the choreography doesn’t.
What kind of character photo works best?
A sharp, well-lit photo showing as much of the body as possible. Real people, costumes, illustrations and game-style characters all work. Avoid heavy filters, extreme close-ups and photos where the body is mostly hidden.
Does my photo need to match the video’s pose?
It’s not required — the AI adapts to different poses — but it’s the biggest quality lever you have. The best results come from a reference photo whose pose matches the video’s first frame. If you don’t have one, re-pose your photo with the Image Edit tool or use the built-in Match position tool to line the photo up on a chosen frame.
How long can the video be?
It depends on your plan: 1-second test on Free, 10 seconds on Kohai, 15 on Ninja, 30 on Ronin and up to 60 seconds on Samurai. For longer projects, process the clip in segments and cut them together.
Can I test the result before rendering the whole video?
Yes. A frame preview renders one finished frame for 2 credits so you can check identity, outfit and lighting first. When a preview looks right, reuse its seed for the full render to reproduce the same look.
Can I use several photos of the same character?
Yes — multi-reference lets you add several photos of the character from different angles, which makes identity and outfit noticeably more consistent. Multi-reference and the high-quality mode are available on the Samurai plan.
Is there a free way to try it?
Yes. A free account can run a 1-second character swap on its own footage — short, but real output from the real pipeline, so you can judge the quality before choosing a plan.
Try it
Upload a clip, pick the person, drop in your character and watch the same scene play out with someone new in it. Open iSamurai free and run your first character swap today.